Performing your own goat fecal egg counts at home is an easy and cost-effective way to monitor internal parasites in your herd. By learning to do fecal tests (also called fecal floats or fecal egg counts) yourself, you can catch parasite problems early and make informed deworming decisions. In this beginner-friendly guide, we’ll explain everything you need to get started – from the equipment you’ll need, to step-by-step instructions, to identifying common parasite eggs under the microscope. Let’s dive in!
Equipment You Will Need
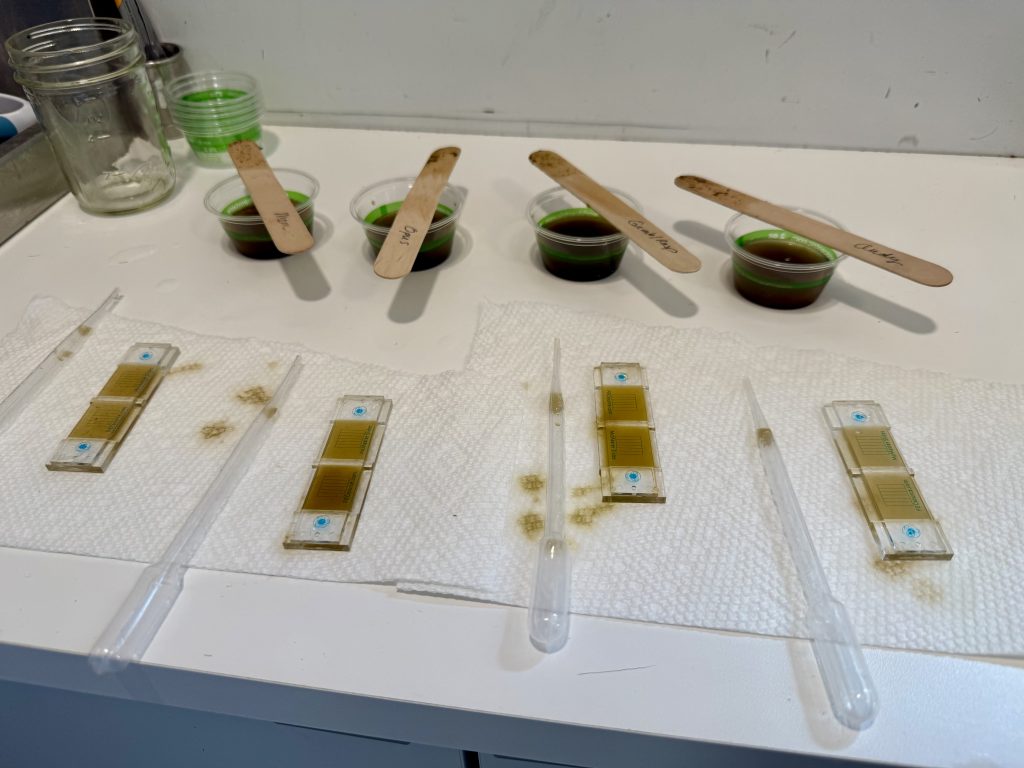
Example of reusable McMaster fecal egg counting slides with visible grid lines for counting parasite eggs
Before you begin, gather the following supplies. Having the right equipment will make the process easier and ensure accurate results
-
McMaster Fecal Egg Count Slides – Special two-chambered counting slides with grid lines. For example, you can use a McMaster Method Egg Counting Slide on Amazon – these slides allow you to load your fecal sample and count worm eggs within a defined grid area
. The grid makes counting easier and more accurate by floating eggs into a known volume beneath the marked lines. Each slide has two chambers so you can count eggs from the same sample twice for accuracy. TIP: Rinse and reuse your McMaster slide after each test to keep it clear (avoid harsh chemicals like acetone which can damage the slide)
-
Compound Microscope (100× magnification) – A standard light microscope capable of at least 100× total magnification (e.g. 10× objective with 10× eyepiece)
. You don’t need an expensive model – many affordable student microscopes (around $80-$150) will work fine. Look for a microscope with a built-in light and a mechanical stage (adjustable knobs) – this helps you scan the slide smoothly to find eggs
. Important: A dissecting (low-power) microscope will not work for fecal egg counts; you need a compound microscope with at least 100× magnification
-
Fecal Flotation Solution – A special solution with a higher density than parasite eggs, used to float the eggs for counting. You can either buy a premixed flotation solution (such as Fecasol or similar sodium nitrate/sugar solution) on , or make your own. To DIY, dissolve salt or sugar in warm water until no more will dissolve (a saturated solution) – this creates a liquid with specific gravity ~1.2–1.3, which will cause parasite eggs to float to the top
. Premixed solutions are convenient and ensure the right density, so beginners may prefer those. Note: Never use plain water – it’s not dense enough to float the eggs.
-
Disposable Gloves – Latex or nitrile gloves for hygiene. Always wear gloves when collecting and handling goat feces to avoid any pathogens. A box of disposable exam gloves is inexpensive and will prevent contamination of the sample (and protect you). Gloves also remind you not to touch anything else (or your microscope) with dirty hands during the process.
-
Collection Container (Cups or Bags) – Small plastic cups or ziplock bags to collect and mix samples. You’ll need a clean container for each goat’s sample. Disposable plastic cups or deli cups work well and can be labeled with the goat’s name like these. Use zip-top sandwich bags to collect pellets. Make sure whatever you use is clean and can be thrown away or sanitized after. Having a lid or cover is helpful to prevent spills.
-
Small Strainer or Cheesecloth – A fine mesh kitchen strainer or cheesecloth to filter fecal matter. After mixing feces with solution, you’ll pour it through a strainer to remove large debris. A simple tea strainer or a piece of cheesecloth works perfectly. This step ensures your final liquid is relatively clear of hay, dirt, and fibers that could obscure your view or clog the slide.
-
Transfer Pipettes or Syringe – For transferring the liquid fecal solution into the McMaster slide chambers. You can use disposable plastic pipettes on Amazon or a small syringe (3–5 mL size) without a needle. This tool lets you draw up the mixed fecal suspension and gently fill the slide. If using a syringe, also grab a larger (30 mL) syringe or measuring cup to measure your flotation solution.
-
Digital Scale (grams) – A small kitchen or jewelry scale that measures in grams, useful for precise egg counts. While not absolutely required, a scale helps you measure feces (e.g. 2 grams) for accurate calculations. If you don’t have a scale, you can approximate (about 8–10 average-size goat pellets are ~2 grams, or use a 3cc syringe packed with feces as ~2g).
-
Other handy items: Lubricating jelly (if collecting directly from the rectum), a tongue depressor or craft stick for stirring and crushing fecal pellets, a marker or labels to keep samples identified, paper towels or puppy pads to keep your workspace clean, and a notepad to record your counts. Having everything ready will make the process smooth!
Step-by-Step Fecal Test Instructions (McMaster Method)
Now that you have your supplies, let’s go through the process of performing a fecal egg count step by step. We’ll use the Modified McMaster method, which is a quantitative technique to count parasite eggs in a measured amount of feces. Don’t worry – it sounds technical, but it’s actually straightforward if you follow each step:
1. Collect a Fresh Sample: Put on your gloves and collect about 2–4 grams of fresh goat feces (roughly a teaspoon-sized amount). Freshness is key – the sample should be moist and recently dropped (ideally within a few hours). The best method is to gently retrieve a few pellets directly from the goat’s rectum using a gloved, lubricated finger. This ensures the sample definitely comes from that goat and hasn’t been contaminated by dirt or mixed with other goats’ stool. If rectal collection isn’t possible, try to collect pellets off a clean surface right after the goat defecates (and label each sample with the goat’s name to avoid mix-ups). Place the pellets into your plastic cup or bag and seal it.
Tip: Keep samples cool – if you aren’t doing the test immediately, store the sample in a refrigerator or cooler for up to 1 day (never freeze it). Avoid old, dried-out droppings from the ground, as parasite eggs may have hatched or deteriorated, leading to inaccurate results.
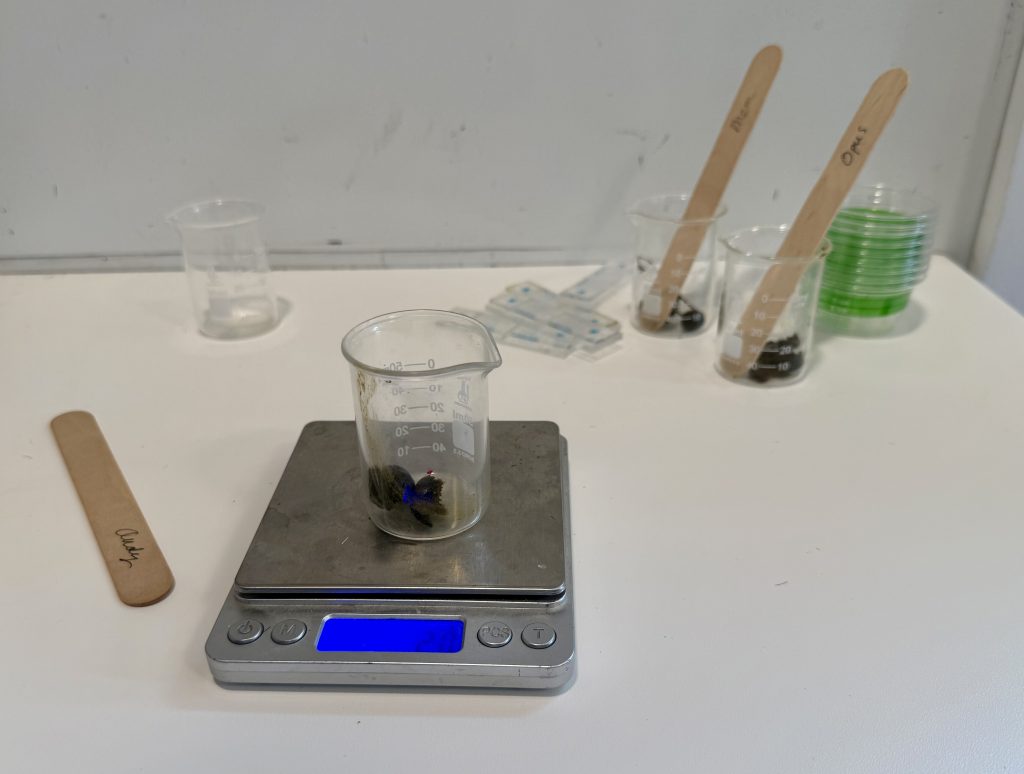
2. Prepare the Flotation Mixture: Next, we’ll create a fecal slurry (poop soup!) with flotation solution. If you have a premixed flotation solution, pour about 25–30 mL into your mixing container. If you made a salt or sugar solution, use that. Using your digital scale, weigh out 2 grams of fecal pellets and put them into the container (2 g is a common amount for McMaster tests). If you prefer to use more feces for higher sensitivity, you can use 4 grams, but adjust the solution volume accordingly (we’ll assume 2 g here for simplicity). Now, add about 28 mL of flotation solution to the feces (for 2 g feces). This ratio is important – using 2 g + 28 mL will allow us to calculate eggs per gram easily later. Thoroughly mix and mash the fecal pellets into the solution using a tongue depressor or craft stick. Break up all the clumps so that the eggs can separate from the fecal matter. You want a uniform soup-like suspension with no large chunks. Take your time to stir well – a well-mixed sample will release more eggs for counting. The flotation solution’s high density will start to suspend the eggs at the top of the liquid.
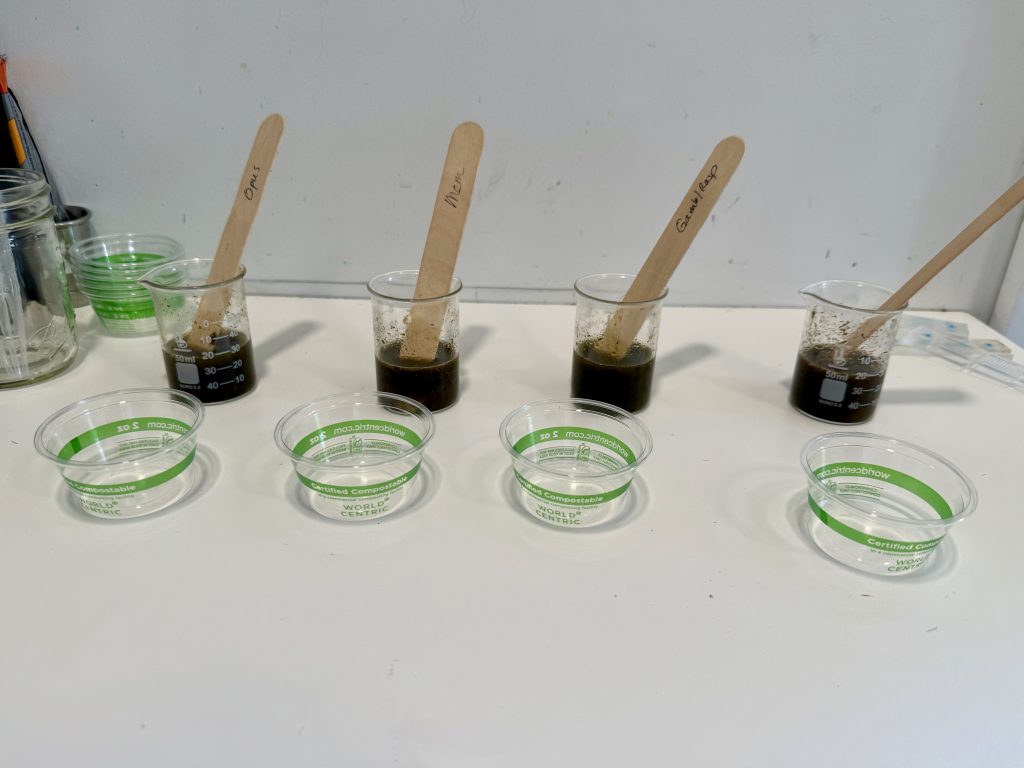
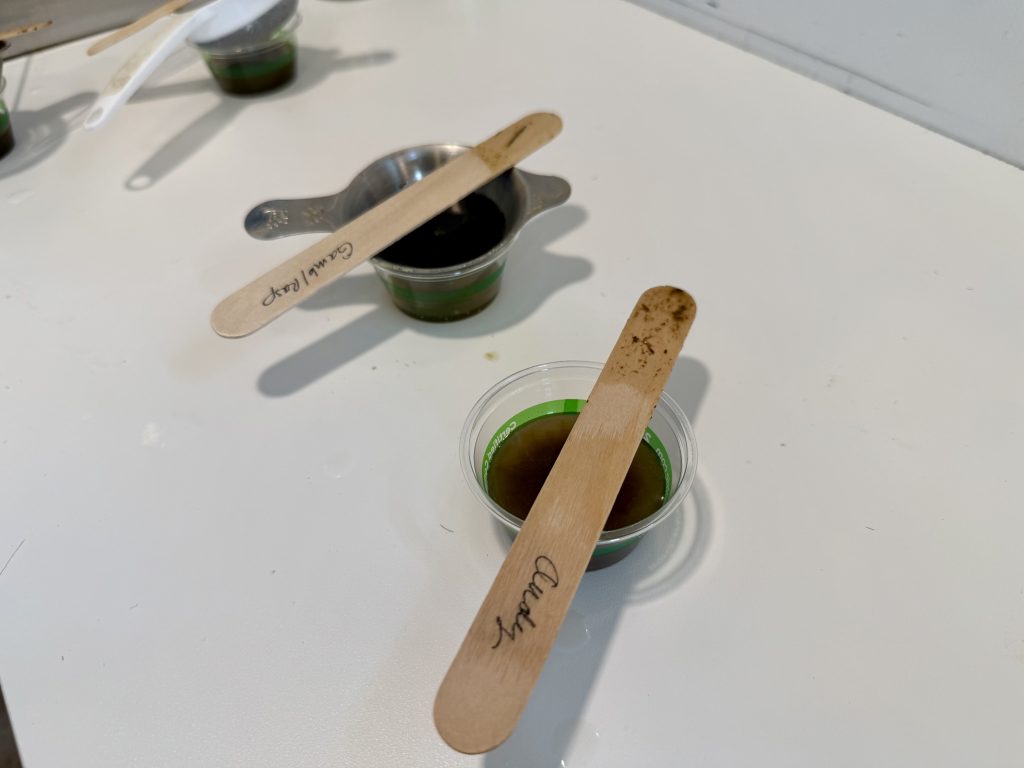
3. Strain the Fecal Mixture: Once the feces is fully dissolved and mixed, strain the solution to remove any remaining debris. Place your tea strainer (or a double layer of cheesecloth) over a second clean cup, and pour the liquid through. The strainer will catch undigested plant fibers, goat berries casing, and other large bits, while the egg-rich liquid passes through. After most has filtered, gently tap the strainer or use your stir stick to squeeze out extra fluid from the fecal mush. You should now have a cup of relatively clear brownish solution that contains any parasite eggs from the sample. Discard the solid bits left in the strainer (and rinse the strainer for the next sample). Note: If your solution sat for a while during mixing, give the strained liquid a quick stir – eggs can settle quickly, and we want them evenly distributed.
4. Fill the McMaster Counting Slide: Now it’s time to load your sample onto the McMaster slide. Hold your McMaster egg count slide level, and use a pipette or syringe to draw up some of the well-mixed fecal solution. There are two chambers on the slide (each with grid lines). Place the tip of your pipette at one end of the first chamber and gently release the liquid until the chamber is full under the cover slip. It takes just a few drops – avoid overfilling. Important: Make sure no air bubbles are trapped in the chamber, as they can distort the results. If you see bubbles, you can tilt the slide or use the pipette tip to nudge them out and add more solution. Repeat the filling for the second chamber, ideally drawing from the top of the mixture (where eggs tend to be) for the second fill. Each chamber should be completely filled with liquid, with the grid etched on the slide clearly visible and covered by the sample. After filling, let the slide sit flat for a minute.
5. Allow Eggs to Float: With the slide chambers loaded, let the slide sit undisturbed for about 5 minutes before examining. This wait time allows the parasite eggs (which are lighter than the solution) to float up to the underside of the cover slip, right against the grid lines. (If you look closely, the McMaster slide has a tiny gap that creates a counting chamber of known volume; eggs will rise to the top of that chamber). Do not shake or jostle the slide during this time. Do not let it sit too long either – reading the slide within 5–20 minutes is ideal. If you wait too long (over ~30–60 minutes), some eggs may sink or crystals can form as the solution cools, making counting harder. Set a timer for about 5–10 minutes after filling the chambers.
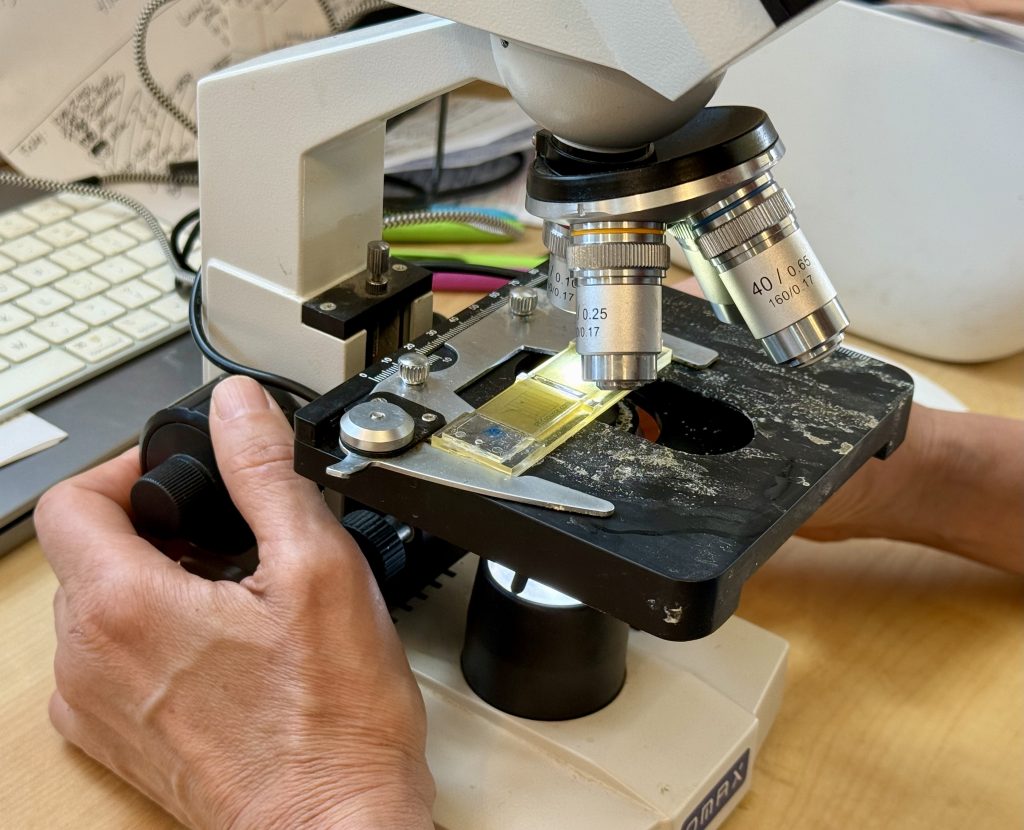
6. Examine the Slide Under the Microscope: After 5+ minutes, it’s microscope time! Place the McMaster slide on your microscope stage. Start with a low power objective (such as 4× or 10×, which gives 40×–100× magnification) to find the focus plane and the grid lines. The McMaster grid will look like a lined pattern (like a grid or lattice) on the slide – focus up and down slowly until the lines come into sharp view. It may help to adjust the microscope’s light for contrast – too bright can wash out the clear eggs, too dim makes it hard to see the grid. Once the grid is in focus, scan systematically: Most McMaster slides have a grid of squares. Use the stage adjustment knobs to move the slide and examine one grid section at a time in a methodical path. You can increase to 10× objective (for 100× total magnification) for clearer egg visualization – parasite eggs will be tiny oval or round objects against the background. There’s no need for very high magnification; 100× is usually sufficient to
. Tip: Focus just below the grid lines – eggs float at the cover slip, so the sharp focus point is the same plane as the grid marks. If your sample has a lot of debris, the grid might be a bit obscured. Take your time and adjust fine focus as needed.
7. Count the Parasite Eggs: As you scan each chamber, count every parasite egg you see within the grid lines of that chamber. Eggs typically appear as oval, translucent shapes with distinct contents inside. (Coccidia oocysts are smaller and more round, as discussed later). It helps to differentiate egg types as you count – for example, note how many are strongyle-type worm eggs vs coccidia, etc.. You can jot down separate tallies if you recognize different kinds. Ignore any eggs (or parts) that lie outside the grid area, as the McMaster calculation is based on the volume under the grid. Also, be careful not to confuse air bubbles with eggs – air bubbles are perfectly round, with a dark rim and a shiny center, whereas true eggs are usually oval and have a darker center with clear edges. (After a bit of practice, you’ll spot the difference easily – bubbles often have a refracted “halo” look, while eggs have internal cell structures). Using a handheld tally counter can be helpful to keep track of counts if there are many eggs. Count all eggs within the grid of both chambers of the slide. For example, you might find 12 eggs in chamber 1 and 8 eggs in chamber 2. Write these numbers down! To double-check yourself, you can move back and recount or have a second person verify difficult-to-see eggs.
8. Calculate Eggs per Gram (EPG): Now comes the math – but it’s a simple formula! Add the egg counts from both chambers together, and multiply by the conversion factor to get the number of eggs per gram of feces. For the McMaster method we described (using 2 g feces in ~28 mL solution and counting two chambers of 0.15 mL each), each egg you counted represents 50 eggs per gram of feces. In practice, the formula is:
Eggs per gram (EPG)=(Eggs counted in Chamber 1+Eggs in Chamber 2)×50\text{Eggs per gram (EPG)} = (\text{Eggs counted in Chamber 1} + \text{Eggs in Chamber 2}) \times 50.
So, if you counted 20 eggs in total (both chambers combined), your sample has 20 × 50 = 1000 EPG (eggs per gram). If you saw only 2 eggs total, it’s 2 × 50 = 100 EPG. This multiplication factor of 50 is specific to the sample size and slide volume we used. (Some McMaster protocols use 4 g feces with a different amount of solution and then use a factor of 25 instead, but the kit or instructions you follow will specify this. In our example, we use the 50 factor for 2 g feces.) The result is a quantitative estimate of how heavy the animal’s parasite burden is. Generally, higher EPG = more significant infection. For instance, one goat’s fecal test might come out to 150 EPG (low), while another could be 1200 EPG (high). We’ll discuss interpreting these numbers shortly.
9. Record and Clean Up: Log the EPG for that goat in your records. It’s good practice to note the date, the goat’s name/ID, and the EPG result (optionally, note the predominant egg types you observed). Proper record-keeping will help you track changes over time or after deworming. Finally, clean your materials: Rinse the McMaster slide thoroughly with tap water (no soap needed, unless it’s greasy – and never use acetone or alcohol on acrylic slides). Dispose of the used fecal solution (flush it or pour it in a spot away from where animals graze). Wash your hands and disinfect any surfaces the feces contacted. That’s it – you’ve completed a fecal egg count!
With the basic procedure done, you now have a number (EPG) that represents your goat’s parasite egg output. Next, we’ll cover what common parasite eggs you might see, and some tips to improve your at-home fecal exams.
Identifying Common Parasite Eggs in Goats
One of the fascinating parts of fecal testing is seeing which parasite eggs are present in your goats’ poop. Goats can host a variety of internal parasites (worms and protozoa), but a few types are most common. Here’s a quick guide to identifying the usual suspects by their egg appearance under the microscope:
-
Barber Pole Worm (Haemonchus contortus): This is a notorious stomach worm in goats. Barber pole worm eggs (and those of related roundworms like Ostertagia and Trichostrongylus) are classic “strongyle” type nematode eggs – they appear as oval, thin-shelled eggs containing a mass of cells inside. They are colorless to light brown and about 70–90 µm in length. Under 100× magnification, they look like little footballs or ellipses with a granular center. It’s difficult to distinguish Haemonchus eggs from other strongyle eggs just by shape (they all look very similar). So, we typically group these as “strongyle eggs.” If your goat has any strongyle-type eggs, barber pole worm could be among them. A high count of strongyle eggs (especially >500 EPG) often suggests a significant Haemonchus infection in goats. (Fun fact: The worm is nicknamed “barber pole” because the adult female has red and white striped pattern; but you’ll only see the eggs in a fecal exam.)
-
Other Gastrointestinal Worms (Strongyles): Aside from Haemonchus, goats may carry other roundworms (like Teladorsagia aka brown stomach worm, Trichostrongylus, Cooperia, etc.). Fortunately, eggs of most GI roundworms look alike under the microscope. They are the same oval strongyle-type eggs described above. So you don’t need to identify each species – you just count them all as strongyle eggs. One exception is Nematodirus (thread-necked worm), which has a much larger football-shaped egg, but this is less common in goats. In general, if you see oval worm eggs ~80 µm long, you can assume they belong to the strongyle group of parasites that includes most of the important goat worms.
-
Coccidia (Eimeria species): Coccidia are protozoan parasites, not worms, but their oocysts (eggs) are commonly seen in goat fecals. Coccidia oocysts are much smaller than strongyle eggs – often only 1/4 to 1/2 the size. They appear more round or egg-shaped and have a clear shell with possibly some blobs inside. In a fresh sample, you might see a single round mass inside; if the oocyst has sporulated (started developing), you may see 4 smaller sporocysts within (typical of Eimeria). Size: about 20–40 µm (tiny!). At 100× magnification, coccidia look like small clear circles/ovals – you might fit many of them across one grid line. They often have a refractive wall and may be confused with air bubbles at first, but their uniform small size and shape give them away. It’s normal to find some coccidia in most goats(especially young ones), but very high numbers of coccidia oocysts (e.g. thousands per gram) in a kid’s sample could indicate coccidiosis, which can cause diarrhea in young goats. So it’s useful to note if you’re seeing predominantly coccidia versus worm eggs. In your counts, you can list “coccidia oocysts” separately from the strongyle eggs, since the interpretation for treatment is different.
-
Tapeworms (Moniezia species): Goats can get tapeworms, and occasionally you might see tapeworm eggs in the fecal float. Tapeworm eggs are quite distinctive – they tend to be triangular or square-shaped, with a shell that often contains a tiny embryo and hooked structures inside. Moniezia (the common tapeworm of sheep/goats) eggs look like thick-walled, angular eggs about 50–60 µm across, sometimes described as having a “triangular” appearance. They may not always show up in a simple McMaster float because they are heavy, but if a goat has a tapeworm, you often see segments (rice-like grains) in their poop. If you do see an egg that looks distinctly triangular or square under the scope, it’s likely a tapeworm egg. Tapeworm infections in goats are usually considered less harmful than barber pole worms, but it’s good to note their presence.
Other parasites: You are unlikely to see liver fluke eggs in a standard fecal float (fluke eggs are large, operculated, and don’t float well in salt solutions). Lungworm eggs or larvae might rarely appear (some lungworm larvae can be seen wriggling under the microscope if present), but those typically require special techniques (Baermann test) to diagnose. For routine at-home fecals, the big three to watch are strongyle-type eggs (worms), coccidia oocysts, and occasionally tapeworm eggs.
By recognizing these different egg types, you can get a sense of which parasites are affecting your goat. For example, a high strongyle egg count with few coccidia suggests a worm problem (like barber pole worm). Conversely, lots of coccidia oocysts in a young goat might point toward coccidiosis risk. Identifying the eggs adds a layer of information beyond just the EPG number.
Calculating and Interpreting Your Results
Calculating the egg count was already covered in the steps, but let’s recap briefly: Eggs per gram (EPG) is obtained by adding up the eggs counted in both McMaster chambers and multiplying by the slide’s factor (usually 50). This gives you a quantitative measure of how heavy the parasite load is in that goat. For example, 100 EPG is quite low, 1,000 EPG is moderate, and 5,000 EPG would be very high. Goat experts generally consider 500–1000 EPG a threshold where deworming might be justified, especially if the goat shows symptoms. However, recommendations vary, and it’s important to consider the goat’s condition (anemic or not, age, etc.) along with the count.
Here are some general guidelines often used for strongyle egg counts in goats:
- Low load: 0–500 EPG – Usually no immediate deworming needed. The goat has a light parasite load.
- Moderate load: 500–1000 EPG – Some intervention may be needed, especially if goat is young, pregnant, or showing some signs. This is a gray zone where management changes or selective deworming might be considered.
- High load: >1000 EPG – This indicates a heavy parasite burden; deworming is likely recommended to avoid health issues. If you see extremely high counts (several thousand EPG), that’s a red flag for a serious worm problem in that goat.
For coccidia (Eimeria) counts, the interpretation is different. Even a few hundred oocysts/gram can be significant in a young kid with diarrhea. A common practice is to treat kids if coccidia counts are over ~1000 oocysts/gram or if they show symptoms, since coccidiosis can stunt growth or be fatal in kids. Adult goats often have some coccidia present with no issues.
Keep records of your fecal exam results. It’s very useful to perform fecal counts before and ~10–14 days after deworming to check how well a dewormer worked (this is called a Fecal Egg Count Reduction Test). A good dewormer should reduce the EPG by >95% in that timeframe. If it doesn’t, the worms might be resistant to that drug – valuable information for your herd health plan.
Remember, fecal egg counts don’t tell the whole story (they measure egg output, which can vary with worm species and the goat’s immune status). They should be used alongside observing the goat’s body condition, FAMACHA score (eye membrane color for anemia), coat condition, and other signs of health. Still, your at-home fecal testing is a powerful tool to tailor parasite control to actual need and avoid over-treating.
Tips for Accurate At-Home Fecal Exams
To wrap up, here are some tips and best practices to improve the accuracy and effectiveness of your at-home fecal testing:
-
Use the Freshest Sample Possible: Fresh feces yield the best results. Eggs can hatch or degrade in old manure. If you can’t examine within ~1–2 hours of collection, store the sample in the fridge (not the freezer!) to slow development. Never use dried-out pellets from the pen floor – they may give false low counts or miss eggs entirely.
-
Avoid Cross-Contamination: Process samples individually and clean tools between goats. Use separate gloves or wash hands between collections. Label each cup/bag with the goat’s name before you start. After one sample is done, thoroughly rinse the McMaster slide, pipette, etc., before the next. This prevents leftover eggs from a high-count sample showing up in another goat’s count.
-
Measure and Mix Consistently: Consistency is key for reliable counts. Use a scale to measure feces, or use the same “number of pellets” each time if estimating. Add the exact amount of flotation solution recommended for your method (e.g. fill to the line on a fecal kit vial, or measure 28 mL for 2 g). When mixing, take your time to mash the sample thoroughly– incomplete mixing can leave eggs stuck in fecal clumps, leading to an undercount. Likewise, always stir the strained liquid immediately before filling the slide so eggs haven’t settled.
-
Check the Slide and Focus: It can be tricky to see the grid lines if your microscope light is too dim or if there’s undissolved matter. If you have trouble finding the grid, try turning up the light or adjusting the condenser. Remove any large floaters by straining well. The grid must be visible to know which eggs to count. Focus up and down slowly – eggs are tiny and transparent, so slight adjustments help bring them into view. Start on low power, find the grid, then zoom in. With practice, you’ll get a feel for the right focal plane where both grid line and eggs are crisp.
-
Don’t Count Debris or Bubbles: Newbies sometimes mistake debris for eggs. Plant debris can look like oval structures, but they often have uneven shapes or dark coloration. Air bubbles are common in the slide – remember, bubbles are perfectly round, with a light center and dark edge, essentially the opposite of many parasite eggs (which are darker in the middle and lighter on the edge). If you’re unsure whether something is an egg, look for telltale features: eggs usually have a defined outline and some internal texture (cells or granules). With experience (and perhaps reference images), you’ll become confident in spotting real eggs. When in doubt, err on the side of not counting an object.
-
Count Methodically & Consider a Counter: It’s easy to lose track if eggs are numerous. Count in a systematic pattern across the grid. Many McMaster slides have a grid subdivided into smaller squares – you can count one row at a time. Using a clicker counter can help – click once for each egg, or each type of egg. Alternatively, tally marks on paper for each chamber work too. Double-check chamber counts by re-scanning if needed. Accuracy in counting directly affects your EPG, so take it slow and focus.
-
Know Your Multiplication Factor: Ensure you apply the correct multiplier when calculating EPG. In our guide we used a factor of 50 (for 2 g feces). Some kits using 4 g feces use a factor of 25. Always follow the instructions for your particular slide or kit. Misapplying the factor (e.g. multiplying by 50 when you used 4 g) would overestimate the EPG. If you’re using a commercial kit, the manual usually states the calculation clearly.
-
Practice and Compare: The first few times, it’s great to practice on a sample from a goat you know has some parasites, so you can see eggs. If possible, compare your at-home count with a vet’s lab occasionally to ensure your technique is on point. You’ll gain confidence as you successfully identify eggs and get consistent results.
-
Clean Equipment Properly: Right after finishing, flush out the McMaster slide with water so no fecal matter dries in it. You can use a bit of soap and soft brush if needed, but rinse well with clean water afterward. Store the slide in its case or a safe place – scratches or residue can obscure the grid. Dispose of used gloves, and sanitize your work area. Keeping everything clean prevents any lingering eggs from causing false positives next time.
By following these tips and techniques, you’ll improve the accuracy of your fecal exams and get the most benefit from them. At-home fecal testing empowers you to target deworming only when needed, check if treatments worked, and overall keep your goats healthier. It might feel a bit technical at first, but with a little practice it becomes a quick and routine chore – some goat owners even find it fun (like a little science project on the farm!).
Congratulations on taking this proactive step in goat care. With your microscope, McMaster slide, and newly gained skills, you have a window into your goats’ internal health. Regular fecal egg counts, combined with good management, a regular herbal dewormer like Squirmy Wormy Bites, and veterinary advice, will help you stay ahead of parasite problems without overusing dewormers. Happy goat keeping, and happy egg counting!
Sources: We’ve based this guide on trusted goat health resources and experienced goat owners’ advice – including university extensions edis.ifas.ufl.edu, small farm experts raftero.com, and veterinary guidelines for fecal egg counting uaex.uada.edu, edis.ifas.ufl.edu. These references can provide further detail for those interested in the science behind the practice. And special thank to Stacey of Haymaker Farm for her guidance and allowing me to photograph her fecal sampling. Good luck with your at-home fecal testing – your goats (and your wallet) will thank you!

Leave a Reply